Jandy FloPro/SHPF/SHPM Mechanical Shaft Seal Replacement | R0479400
Jandy FloPro/SHPF/SHPM Mechanical Shaft Seal Replacement | R0479400
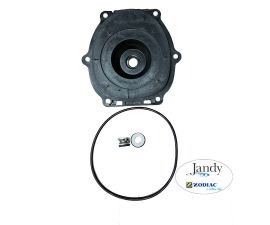
SKU#: R0479400
Jandy Pro Series FloPro (FHP)SHPF/SHPM Series Pump Mechanical Shaft Seal Replacement R0479400
$29.99
![]()

-
Product Details
About this product
Features

Brand Information

Build the perfect pool environment with Jandy professional-grade swimming pool equipment. With a full line of pumps, filters, heaters, lights, valves, water sanitizers, and the automation solutions to control it all, Jandy has the complete equipment package for any swimming pool or spa.
Visit Manufacturers Website -
Specifications
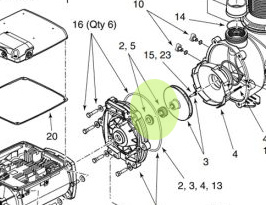
5. Backplate, Hardware and Mechanical Seal Replacement Refer to Figure 4 and the associated parts list to identify the parts included in each replacement kit.
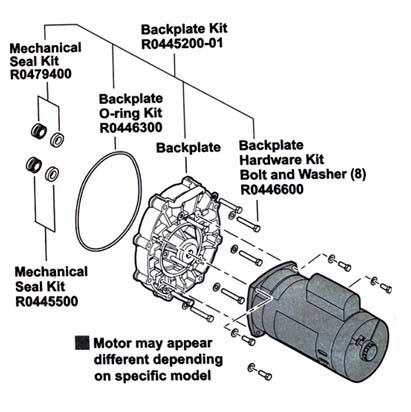
Figure 4. Backplate, Hardware and Seal Replacement Kits
5.1 Disassemble Backplate and Impeller
1. Using a No. 1 Phillips screwdriver, remove the two (2) screws attaching the diffuser to the backplate. Carefully remove the diffuser from the backplate and remove any debris from the inlet and outlet of the impeller.
2. Remove the motor shaft cover on the back of the motor by twisting the hex-head screw 90° with a crescent wrench. The motor shaft will be exposed.
NOTE Disregard step 2 if your motor is a Variable speed model.
3. Hold the exposed motor shaft with the wrench while removing the impeller center screw using a No. 2 Phillips screwdriver.
NOTE The impeller screw is a left-hand threaded screw. Therefore, tum the screw clockwise to loosen it.
4. Hold the motor shaft with the wrench while unscrewing the impeller from the motor shaft with your hand.
NOTE The impeller is a right-hand thread. Therefore, turn it counter-clockwise to unscrew it.
5. Remove the impeller from the backplate and motor shaft.
5.2 Replace Mechanical Seal
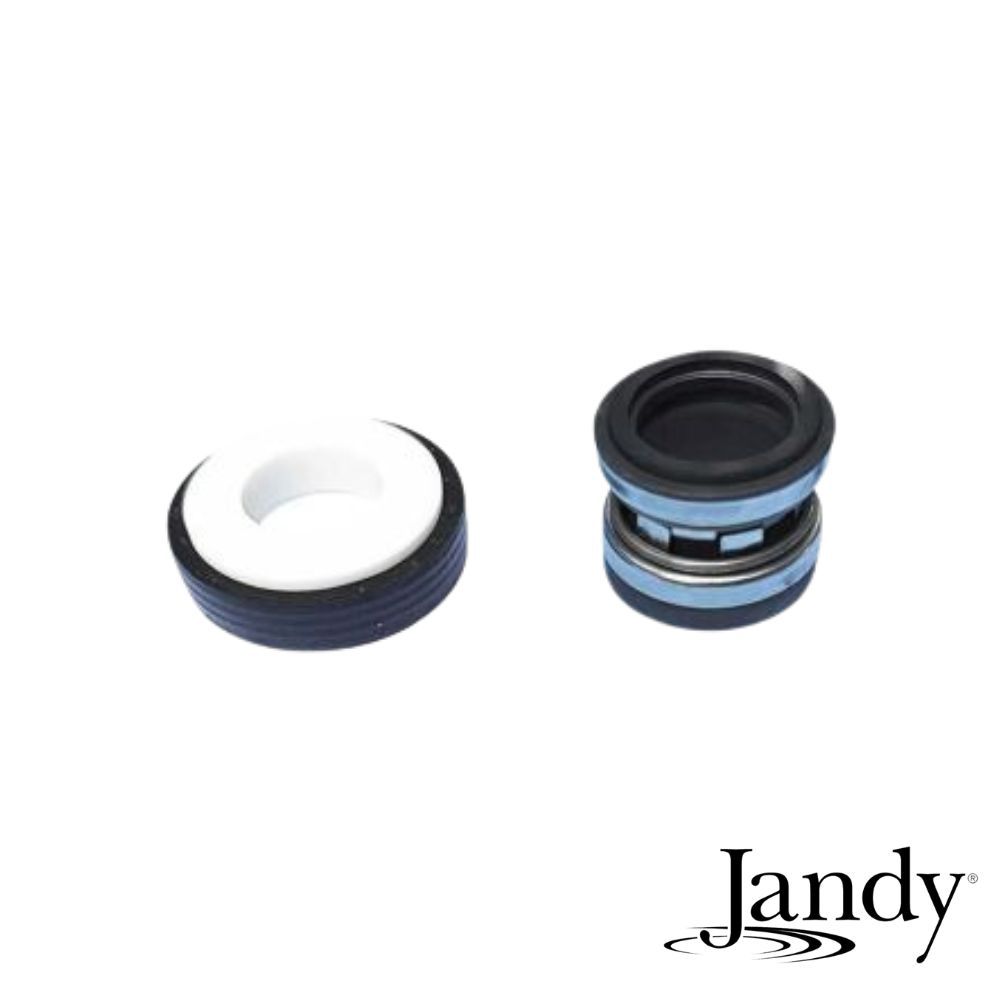
NOTE The mechanical seal consists of two (2) parts, the carbon/spring face seal (installed on the impeller) and the ceramic face seal (installed on the backplate). See Figure 5.

Figure 5. Mechanical Seal Assembly with Impeller with Sleeve
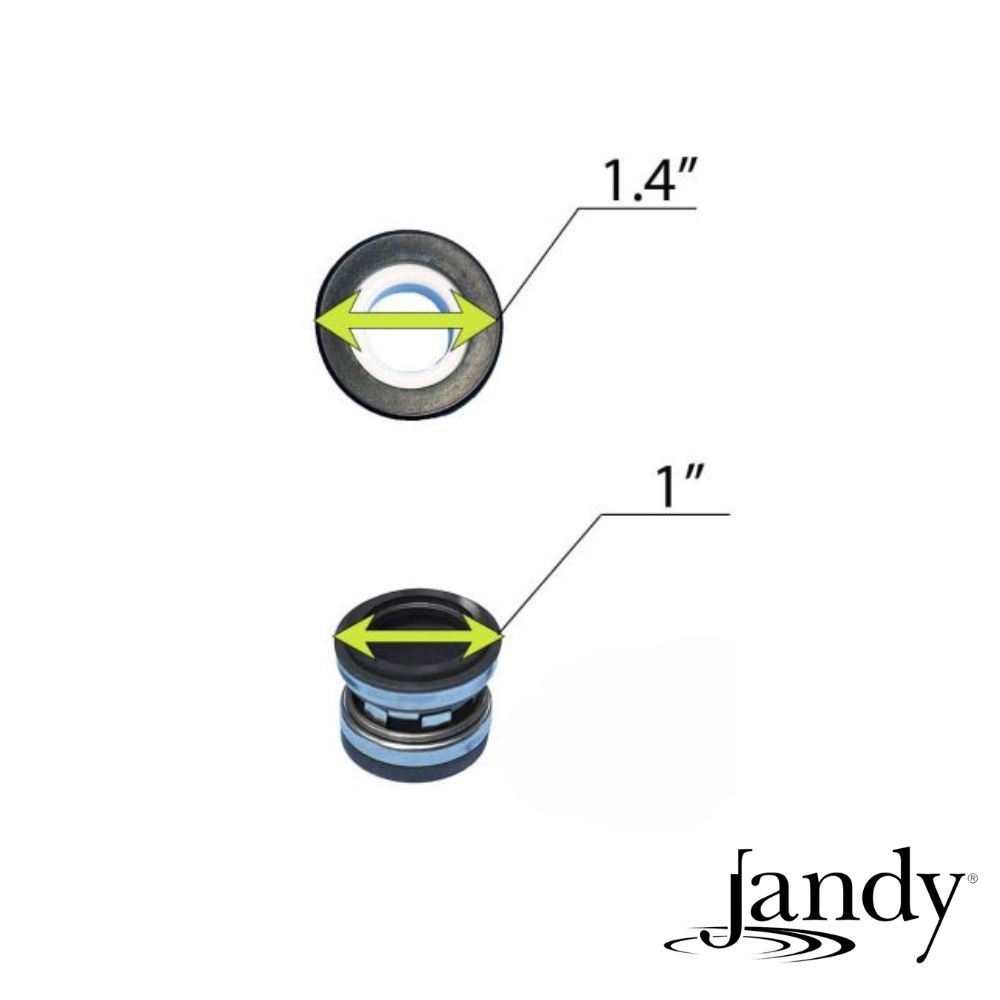
1. Select the mechanical seal that matches the impeller or the serial number on your pump. See Figure 6.
a. If the impeller on your pump has a sleeve or if the serial number on your pump is Rev N or lower, use the mechanical seal (Seal A R0445500) with the larger inside diameter. Go to step 2.
b. If the impeller on your pump does not have a sleeve or if the serial number on your pump is Rev P or higher, use the mechanical seal (Seal B) with the smaller inside diameter. Go to step 3.
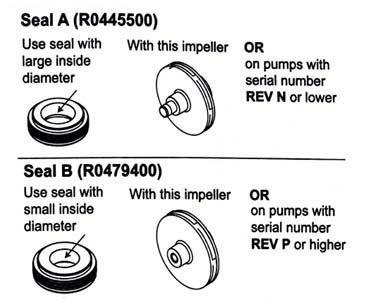
Figure 6. Selecting Mechanical Seal
2. Replace the carbon face from mechanical seal (Seal A) on the impeller with the sleeve. See Figure 5.
a. Remove the carbon face seal half from the impeller. This is a spring-loaded seal.
b. Grasp the portion of the seal closest to the impeller body and pull the seal off using a twisting motion.
NOTE If you plan on replacing the Ceramic Seal, proceed to step 4 before proceeding to step C. Be sure to keep seal and mating parts clean.
c. Press the new carbon face seal half on the impeller sleeve using a twisting motion. Make sure the carbon surface is facing toward the ceramic ring in the backplate. Go to step 4 after reading the following CAUTION and NOTE.
NOTE To assist assembly, use only water or a soap solution as a lubricant. Any other lubricant will destroy the seal after a short period of time.
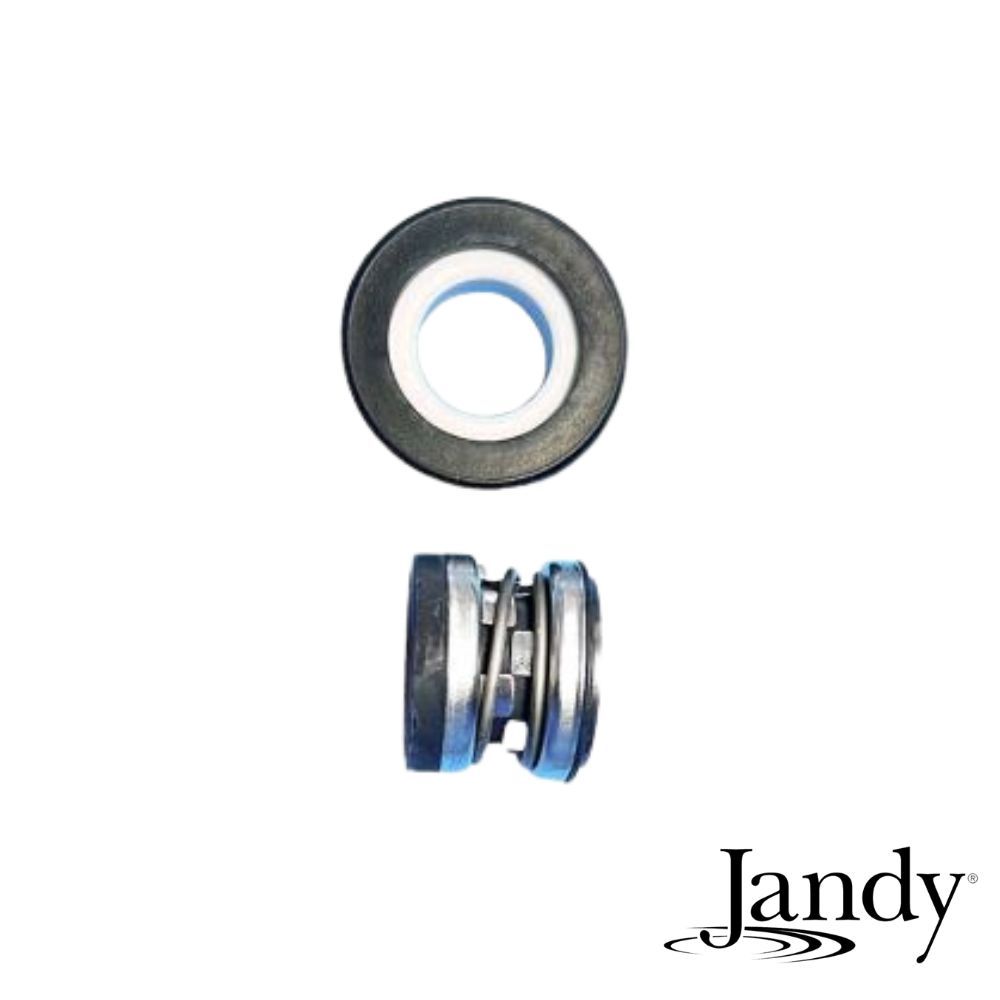
3. Replace the carbon face from mechanical seal (Seal B -R0479400) on the impeller without the sleeve. See Figure 7.
a. Remove the carbon face seal half from the motor shaft. This is a spring-loaded seal.
b. Grasp the portion of the seal closest to the impeller body and pull the seal off using a twisting motion.
NOTE If you plan on replacing the Ceramic Seal, proceed to step 4 before proceeding to step C. Be sure to keep seal and mating parts clean.
c. Press the new carbon face seal half on the motor shaft using a twisting motion. Make sure the carbon surface is facing toward the ceramic ring in the backplate.
NOTE To assist assembly, use only water or a soap solution as a lubricant. Any other lubricant will destroy the seal after a short period of time.
4. Replace the ceramic seal on the backplate. NOTE To replace the ceramic seal on the backplate, the motor must be removed from the backplate.
a. Remove the motor from the backplate, as described in Section 5, Motor and Attaching Hardware Replacement.

Figure 7. Mechanical Seal Assembly with Impeller without Sleeve
b. Place the backplate ceramic side down and force the ceramic seal out using a screwdriver or drift.
c. Turn the backplate over and insert the new ceramic seal into the backplate.
5. Continue with Section 5, Motor and Attaching Hardware Replacement, to replace the backplate and the backplate o-ring and install the motor onto the backplate.
-
Q/A
No Questions


Log in
Create a Free Account
Please fill out sign-up form
Sign up with your social media account
Or
Fill out sign up form
Why create an account
Sign up with your social media account