
Find your parts diagram
Sticker on the pump body (the part with the basket), not on the motor. Motor labels from Century, A.O. Smith or Regal won't match parts.
Label on the side of the tank near the base. Size is in sq ft, e.g. 420 sq ft = C4030 or CCP420.
Rating plate inside the front access panel. Note the BTU and gas type (NG or LP).
Molded into the body or printed on top. Robotic cleaners: on the power supply.
Still not sure? Call (855) 767-7665 and we'll find it for you.


R0915600 | Polaris Engine Assembly For Atlas Cleaners
Fits these models
Pickup, delivery and shipping times are estimates, not guarantees.
Couldn't load pickup availability
● 249 in stock30-day returns Secure checkout
Have a question about this part?
Ask about fit, specs or shipping and get an instant answer.
Goes with this part
CA P65 Warning: Cancer and reproductive harm. www.p65warnings.ca.gov
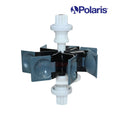

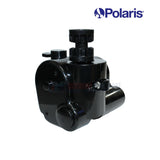
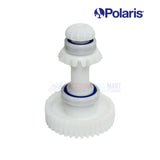
OEM Polaris Engine Assembly R0915600 is a direct replacement component engineered for Polaris Atlas and Atlas XT suction-side pool cleaners. This engine assembly plays a key role in sustaining peak cleaning performance by enabling smooth and efficient operation. Built with durable, high-grade materials, it ensures consistent reliability and a long service life. With a user-friendly design, this assembly simplifies the maintenance process and brings your cleaner back to its full debris-removal capability.
-
Engineered for Compatibility: Fits Polaris Atlas and Atlas XT suction-side pool cleaners for seamless integration and maximum performance.
-
Performance Enhancer: Maintains consistent suction and operation, helping your cleaner perform at optimal levels across all pool surfaces.
-
Reliable Material Quality: Constructed from premium materials to offer superior durability in harsh pool environments.
-
Boosts Cleaning Efficiency: Reestablishes full functionality to improve the cleaner's ability to capture dirt and debris effectively.
-
User-Friendly Setup: Designed for straightforward installation, reducing downtime and restoring your system quickly.
- Polaris Atlas, Atlas XT, and MAXX Cleaners
1. Push the latch release button on the top of the cleaner to open the cover.
2. Open the lid and inspect the engine. Remove any debris.
3. If necessary, pull the engine by the engine blades and remove it. No tools required (Figure 11).
4. Reinstall the engine. Make sure the engine is positioned with the large wheel on the right side when reinstalling.
5. Close engine cover and ensure the latch clicks in place.

